
If disaster strikes your WordPress site, your first thought should be to restore it from a backup. But can you create a fresh WordPress install from an old database backup?
The answer is “yes, but keep reading”—restoring a WordPress site from a database backup is doable, but you’ll need to be thoughtful in how you go about it.
WordPress Database Backups vs. File Backups
To back up a WordPress site fully, you need two types of backup: a file backup and a database backup.
To back up a WordPress site fully, you need two types of backup: a file backup (or “filesystem backup”; same thing) and a database backup.
Your database backup stores the contents of your WordPress database, as a single giant .sql file. Your file backup stores your entire WordPress filesystem: the thousands of files (.php, .js, .css, .png, .jpg, and so on), organized into folders, that make up WordPress’s core software, your themes, and your plugins.
The reason you need both of these backups is that neither has the full information to build a WordPress site. They complement one another.
What is saved in a WordPress database backup?
- Posts
- Pages
- Custom post types
- Comments
- Theme settings
- Plugin settings
- Users
What is saved in a file backup?
- Images or other media
- Themes
- Plugins
Let’s assume that the worst has happened. Your site is gone. You find that your host hasn’t taken backups. You tried to schedule a file backup, but your cron job failed, so the backup didn’t succeed. But you do have a recent database backup. Will this suffice?
First, take a look at the test site I built which I aim to restore.

Now let’s go through the steps to create a fresh WordPress install from an old database.
1. Create a database and user
First, you need to create a new database and user with the appropriate permissions. If you use cPanel hosting, open up MySQL Databases.

Add a suffix to the new database and click Create Database:

Once you have added the new database, you need to add a MySQL user. It’s simplest if you make the username the same as your database name. Keep a note of the database name, username, and the password you create.

Then add the user you created to the database:
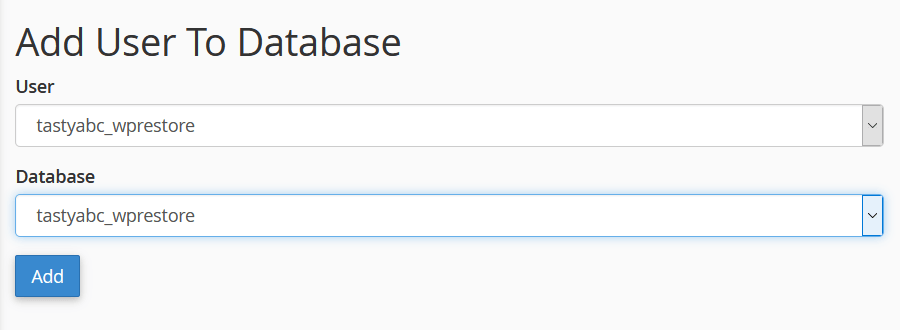
Next, you’ll be prompted to check your user’s database privileges. Check “All privileges” and then hit the “Make Changes” button.

2. Import your database backup
Typically hosts use phpMyAdmin to manipulate the WordPress database. If your host has a different solution, the process should be similar to the one below.
Open the database you created and go to the Import link.
Browse your computer for your database file and open it. Your file may have a .sql extension, or it may be compressed, with a .sql.zip or .sql.gz extension.

Use the Go button to run the import.
If you have difficulty importing your database because the file is too big, one solution is to try BigDump, a PHP script which breaks up your SQL file into smaller chunks for import.
3. Reinstall WordPress core files
Your next step to create a fresh WordPress install from an old database backup is to reinstall WordPress core files. Download the latest version of WordPress. At the time of writing that’s version 5.3.2.
Unzip your download’s zip file. Within the folder created is another folder, wordpress, which contains the files and folders you need.
The simplest way to upload and reinstall WordPress core files is to use an FTP client. Upload the contents of the wordpress folder to your public_html directory. If you don’t have a public_html directory, look for one named htdocs or www.

If WordPress was installed in a subdirectory originally, make sure that you upload the files to the same subdirectory. So, if your site was at example.com/wp/, your WordPress files should go in a /wp/ subdirectory.
4. Reinstall WordPress
When your database is imported and your files are installed, you can then reinstall WordPress.
Go to your site’s URL and you should see the WordPress setup page, with the dialog to choose a language.

After you’ve chosen and language and continued, complete the information about your database, using the database name, username and password you saved earlier.
The default table prefix is wp_. Open and check your database backup file for the table prefix. Change the value on screen from wp_ to the one in the backup if yours is different.

If all goes well, you’ll see this:

Run the installation, and you should be told that WordPress was already installed, because you imported the database backup.
You can now log in. When you do, you should be safely within the WordPress admin.

Are you done? Not yet!
Remember that to reinstall WordPress without losing content, you need to replace both the database and the files. If you only have a database backup, your files will be missing. You’ll need to take a few more steps to get your site back to the way it was.
5. Reinstall the WordPress theme
The first issue to fix is your theme. In Appearance > Themes, you can see the active theme is broken.

Also, on the front end is this notice:

Install and activate the missing theme by searching for it in the WordPress.org directory. If it’s a premium theme, upload the theme as a zip file.
What if your site used a child theme? Normally, using a child theme is an excellent idea, but when restoring from a database backup, you may be at a disadvantage. You’ll need to install the parent theme and restore any child theme customizations from scratch if you didn’t have a theme backup.
6. Reinstall WordPress plugins
The next problem is that all your plugins will be missing. Go to the Plugins section of the admin and you’ll see that Akismet and Hello Dolly will be there, because they are part of a fresh WordPress install. If you weren’t using them, you can delete them.
Make a note of all the plugins that are deactivated due to an error.

If you peek at the front end in a new tab, you might see shortcodes, like this one for Ninja Forms:

Guess what? You need to reinstall and reactivate all the missing plugins, either by searching the plugin directory or via zip files. With any luck you have zip files of any premium plugins on hand. If not, you may have to log in to the vendor’s website and download the latest version or else buy a new copy.
7. Reinstate WordPress widgets
Now that your plugins are installed, the contact form is back, but some of the sidebar widgets are missing. We can fix this by dragging them back into the right sidebar widget area.

As you can see, though, there are some broken images in the Recent Posts widget.

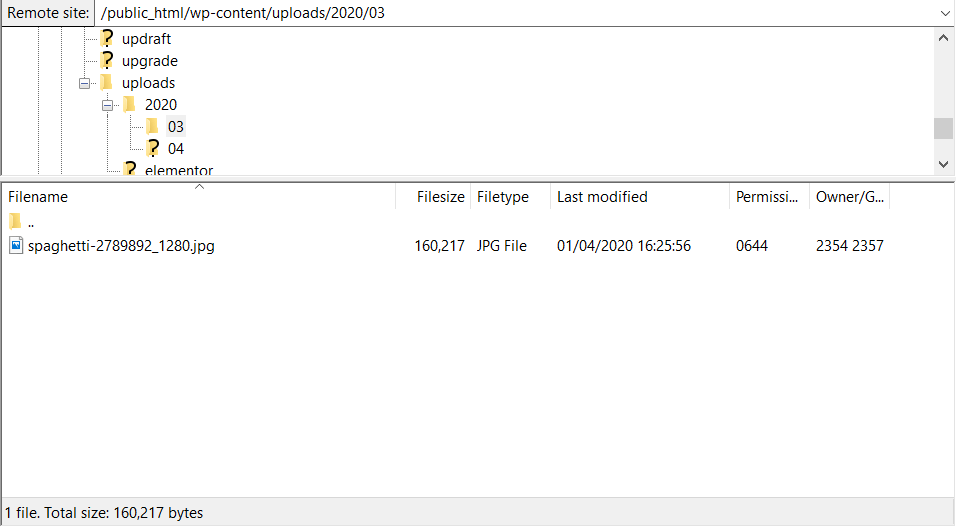
The Media Library is full of broken images:

Also, the homepage looks pretty bad. The images are gone, and the styling of that page, built with Elementor, is missing.

Resaving the page in Elementor solves the styling issue, but what about the images?
8. Fix missing images
Now we come to the hard bit. Reinstating missing images is the biggest problem, and unfortunately there isn’t a simple remedy. If you have a lot of images, it will be a slow process.
You can find broken image links for a single URL by running it through this Image & Link Analyzer. Copy and paste the table into a spreadsheet to see the full image URLs. One warning: this tool won’t find any background image URLs.

Uploading images you have stored locally
If any of the missing images are on your local computer, or accessible in cloud storage, you can upload them again via FTP. Ideally you want the full-size images, so you can recreate the other sizes that WordPress uses.
Make sure that you upload your images to the same folder as they were in originally: if that folder doesn’t exist on the web server, create it, otherwise you’re at even more risk of being unable to reinstall WordPress without losing content. As well as using the tool above, you can check the folder path by checking image URLs in the Media Library, or by inspecting each broken image on a page.
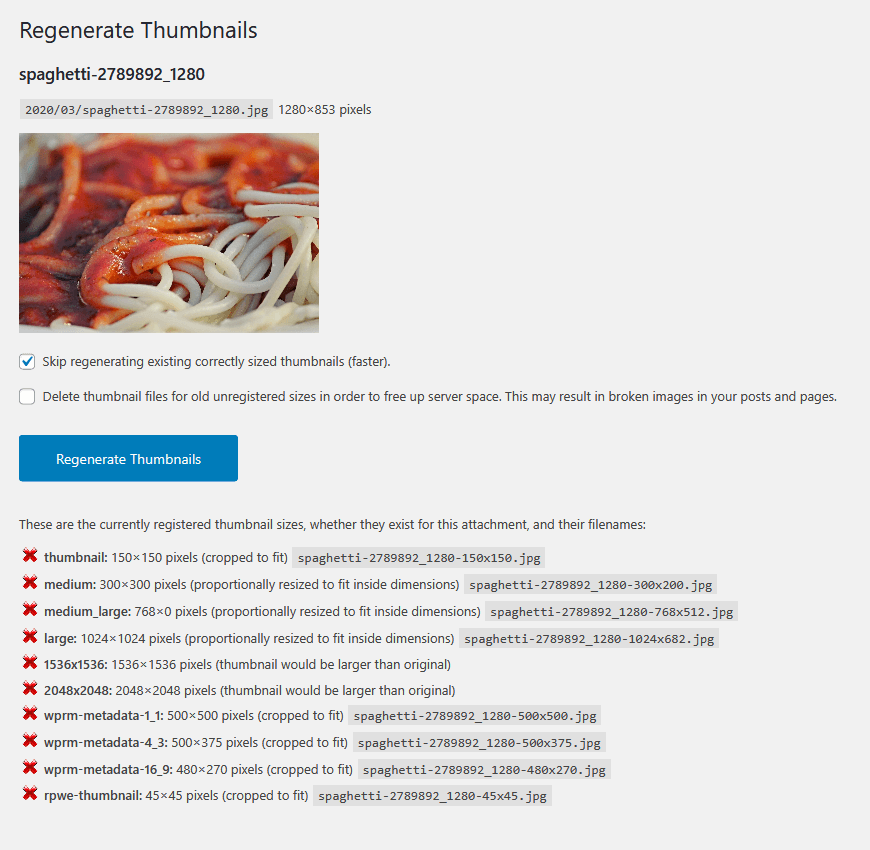
Use the Regenerate Thumbnails plugin to regenerate all the thumbnail sizes for any images you replace.
Finding images elsewhere
If you don’t have any of your website’s images stored, what then?
If you installed any demo content for your site, you might be able to find and reuse images from the demo, assuming you didn’t replace them with your own ones. In my case, I used GeneratePress’ Tasty demo, Elementor’s Restaurant Homepage and WordPress’ Theme Unit Test Data, so could retrieve the images from them.
Otherwise, a useful site to know about is ViewCached, which will show you cached versions of a website.

Use the Google button to see pages that Google has cached recently. Right-click on any image on the page to see the option to save it. If you have many images to save, you can use a Chrome extension called Image Downloader to quickly download any or all images from a page.

If you need to go further back in time, you can view a site through the Internet Archive. Not every web page is likely to have been saved, so there’s no guarantee you’ll find the images you want, but it’s worth a try.

If your website hasn’t been crawled by search engines — say because it’s a development site — but you have visited it lately in Chrome browser, you could try using the ChromeCacheView tool. It will show you cached files for any site you’ve visited recently.
Sort the results by URL, find your site’s URL and look for image files. If you’re lucky you’ll be able to save and restore some of your images this way. I found that when I tried, I got 10 or so images back, but I had to change the file extensions from .jfif to .jpg.

If all else fails…
If you’ve exhausted all options in sourcing your images, you’re left with a couple of choices. Either you can remove the broken images from your website altogether, or you can replace them with new ones.
Neither is an appealing thought if you had a media-rich website, like a photography site, so I hope you don’t find yourself in this position.
Summing up
You’ve now learned how to reinstall WordPress without losing data (hopefully!) While you can create a fresh WordPress install from an old database backup, it’s a time-consuming process. Losing your media is likely to be your biggest headache and the part that takes the longest time to resolve.
The main lesson from this exercise is to back up your site often.
The main lesson from this exercise is to back up your site often—the whole thing, not just the database. You can never have too many backups. It also pays to choose a good hosting company. A decent host will back up your site daily and restore it on demand.
Lastly, if this article has whetted your appetite to learn more about WordPress development, have a look at our complete introduction to WordPress development, Up and Running. It’ll get you understanding the nuts and bolts of WordPress quickly, allowing you to create your own themes and plugins with confidence.

Hi Claire
Great post.
cPanel has an option, via Softaculous, to make installations of WP, backups and updates (plugins also). I’ve started using it in some websites and it’s quite smooth.
Do you see any problem with this method?
Thanks