
Once you have your development environment set up, and a child theme ready to be filled in, there’s one more handy tool you’ll want to understand before you start making changes to your site. Google’s Chrome Inspect Element feature has become a beloved tool by developers because it allows you to see the code behind any given feature of your site from the front end. If you’re using a theme you didn’t hand code yourself, you’ll need to figure out what classes and ids correspond to which parts of your site before you can start making changes. Here’s how to use Chrome Inspect Element to quickly get the information you need to start designing your site.
Here’s a video explaining:
Here’s it written out:
- Download Chrome (if you don’t have it already).
- Type in the URL of the page you’ll be making changes to. (In this case, I’m assuming you’ve already activated the theme you want to use and hopefully have some filler content).
- Highlight and right-click the area of your site that you want to see the code for. In this case, I’ll be looking at the author bio that pops up under new posts.

- Select “Inspect Element” from the context menu that pops up when you right-click.
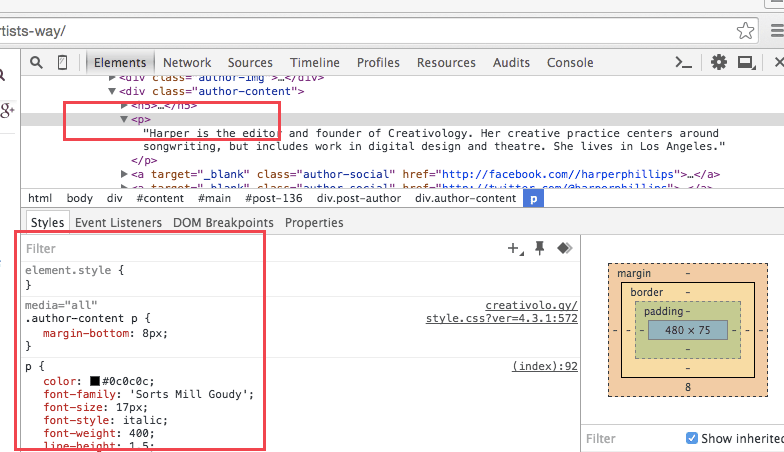
- A new area within your browser will pop up with the line of HTML highlighted that corresponds with the area you selected, and the corresponding CSS available below.

- By looking at the CSS, you can tell which element in your stylesheet is controlling the design elements. In this case,
.author-content pis the class for that specific area, though most of the styling is inherited from the paragraph elementp.

You can do this for any element of your site, and write and adjust code until everything looks pixel perfect! For more information about Chrome’s developer tools, check out Google’s document site or some great tutorials on YouTube. (Also know: though this guide is specific to how Chrome’s works, most other browsers have a similar feature!)
