
The WordPress block editor is already pretty useful right out the box. It comes with a solid set of basic blocks. Otter Blocks promises it can improve on that, and extends the block editor in all sorts of different ways.
This review walks through what Otter has to offer; the blocks it installs, how some of them work, how you can use design patterns to drop in some nice sections to your pages, or how you can take advantage of a whole design library to import finished pages. I also cover the new AI features that might come handy in many applications, plus much more.

This is for anyone building sites in the block editor who wants to make the experience a bit more polished and a bit more functional. If you have ever opened the block inserter and wished there were something better there, this is for you.
Let’s get this Otter Blocks review started!
An introduction to Otter Blocks
The WordPress block editor is designed for beginners to create online content. You’ll be able to add text, media, theme elements, patterns, and more. However, you may not find every feature you need in there natively.
This is where Otter Blocks comes in. By installing this plugin, you’ll extend the default block editor with new blocks, custom CSS, animations, block visibility conditions, AI features, full page designs you can import with one click, and more. The free version of the plugin you can get from WordPress.org:
The main benefit and strong aspect of Otter Blocks IMO is that it works in the native block interface of WordPress’. So there’s no need to learn a new system like you’d have to with Beaver Builder, or Divi, or even Elementor. Otter sits inside the interface that you’re already familiar with.
Otter Blocks review: A look at seven key features
To start, 🏁 we’ll take a look at seven of the most helpful new tools that you get when you use Otter Blocks:
1. Available blocks
One of the main reasons to install Otter Blocks is that it adds new blocks to Gutenberg. Although there are many default blocks to choose from, you might need additional features and functionality.
After activating Otter Blocks, it will install over 30 new blocks. Here are just a few of the features that will be added to your block editor:
- Advanced heading
- Section
- Slider
- Accordion
- Countdown
- Contact Form
- Posts
- Product Review
- Service
- Pricing & Pricing Section
- AI Block
- Tabs
- Sharing icons
- Testimonial
- Maps
To find these options, open your list of blocks and scroll to the Otter section. Here, you’ll discover many new ways to customize your pages and posts:

For example, you might add a countdown timer to an upcoming event. Without Otter Blocks, you’d have to install a third-party plugin just for that. However, instead, you can simply insert the Countdown block:

Then, you’ll be able to customize the block settings with an end date and time. You can also change the color, dimensions, typography, and border.
Another popular block would be the Form block. Otter comes with some presets there – like for a contact form, for example. I’m sure most sites would need that. And the best part, again, is that you can set up a fully functional contact form without any additional plugins here.

You can also take a look into Otter’s settings and pick the exact blocks that you need on your site. It’s good that Otter lets us filter through those and doesn’t force us to look at some blocks we’d never use.

Ultimately, Otter Blocks provides an extended toolset for controlling the appearance and functionality of your website. It enables you to add and customize pop-up windows, sliders, forms, product reviews, and much more.
2. Block patterns library
You can streamline the design process using block patterns. These are pre-designed collections of blocks for quickly putting together pages. WordPress already comes with an array of these, but they might not cover the specific style you have in mind.
However, Otter Blocks provides a new patterns library with beautiful layouts for all sections of your website. With just one click, you can instantly implement new headers, footers, author boxes, calls to action, and more:

As you’ll notice there in the screenshot (at the bottom), there are more than 200 patterns available.
Once you find a pattern you like, you’re able to update the layout, structure, and style.
Click on specific elements to edit them. You’ll use the block editor’s standard functionality to update text, media, buttons, and any other element:

You can repeat this editing process with any Otter Blocks pattern. It can help you quickly set up hero images, testimonials, create galleries, pricing boxes, and calls to action.
3. Design library
Setting the individual blocks and patterns aside, Otter actually seems to offer a lot more in terms of pre-made designs. There’s a whole design library waiting for you there. Just click on the Design Library button when working on a post and you’ll see a collection of 150+ templates for different purposes.

It’s nicely catalogued based on the purpose of the section or its design specifics. You’ll find loads of content sections, conversion elements, media additions, and more.
For example, if you need a more fancy contact form, you’ll find several designs in the library. Just click on any of them, and it’s going to be imported onto your page.

As with all the other blocks and sections, this one too will allow you to do customizations, replace elements, and so on.

Overall, the design library is a very nice addition that can speed up your website build process and give you a nice foundation to build upon … instead of having to start from scratch.
4. AI content generator
It seems that all software solutions these days have to come with some AI features by law, but Otter’s are actually quite useful.
Mainly, you get a whole set of tools to rewrite/tune up/edit your content. Just click on the star/magic icon next to any existing block – like a section of text – and enter the Edit with AI section:

Once there, you can pick from a number of actions: rewrite, summarize, expand, shorten, translate, change tone, fix grammar, and simplify. This can be quite useful if you want AI to just have a quick look at your work and contribute an edit.
For example, if you click on the main Edit with AI button, you’ll see your original text and some suggested actions:

You can enter your own prompt or pick from some pre-made prompts. If you like the change, just click on Apply. Overall, this is quite nice, and the quality of the result depends highly on the actual LLM you pick for the job, so it’s somewhat outside of Otter’s ability to control. Either way, a great, non-intrusive addition to this plugin.
It all works through WordPress’ native AI connectors layer. If you don’t have that enabled yet, Otter is going to guide you through the process.
Apart from these AI actions, there’s also a whole AI Block available. Just pick it normally from the sidebar like any other block. You’ll see this:

Basically, you can tell Otter what you want to put on the page, and Otter AI is going to take over and build you this using blocks that come in Otter. For example, I told it to “build me a call to action section for an adventure bike dealership.” Here are the results:

Then I could just add it to the page by clicking on Insert section. This has been really easy to use, which is great from a user’s point of view, who doesn’t have to know the ins and outs of web design or coding to use these features.
5. Animations
If you want your site to be more engaging, consider adding animations. Often, moving content can be more interactive than static media or text. Fortunately, Otter Blocks contains a variety of animations.
First, select a block to open its settings. Then, scroll down to the Animations section. Here, you’ll see options for different types of animations:

The first option will give you different ways to load your content. Otter Blocks supports bouncing, fading, flipping, rotating, sliding, zooming, rolling, and more. Once you choose an animation, it will automatically play:
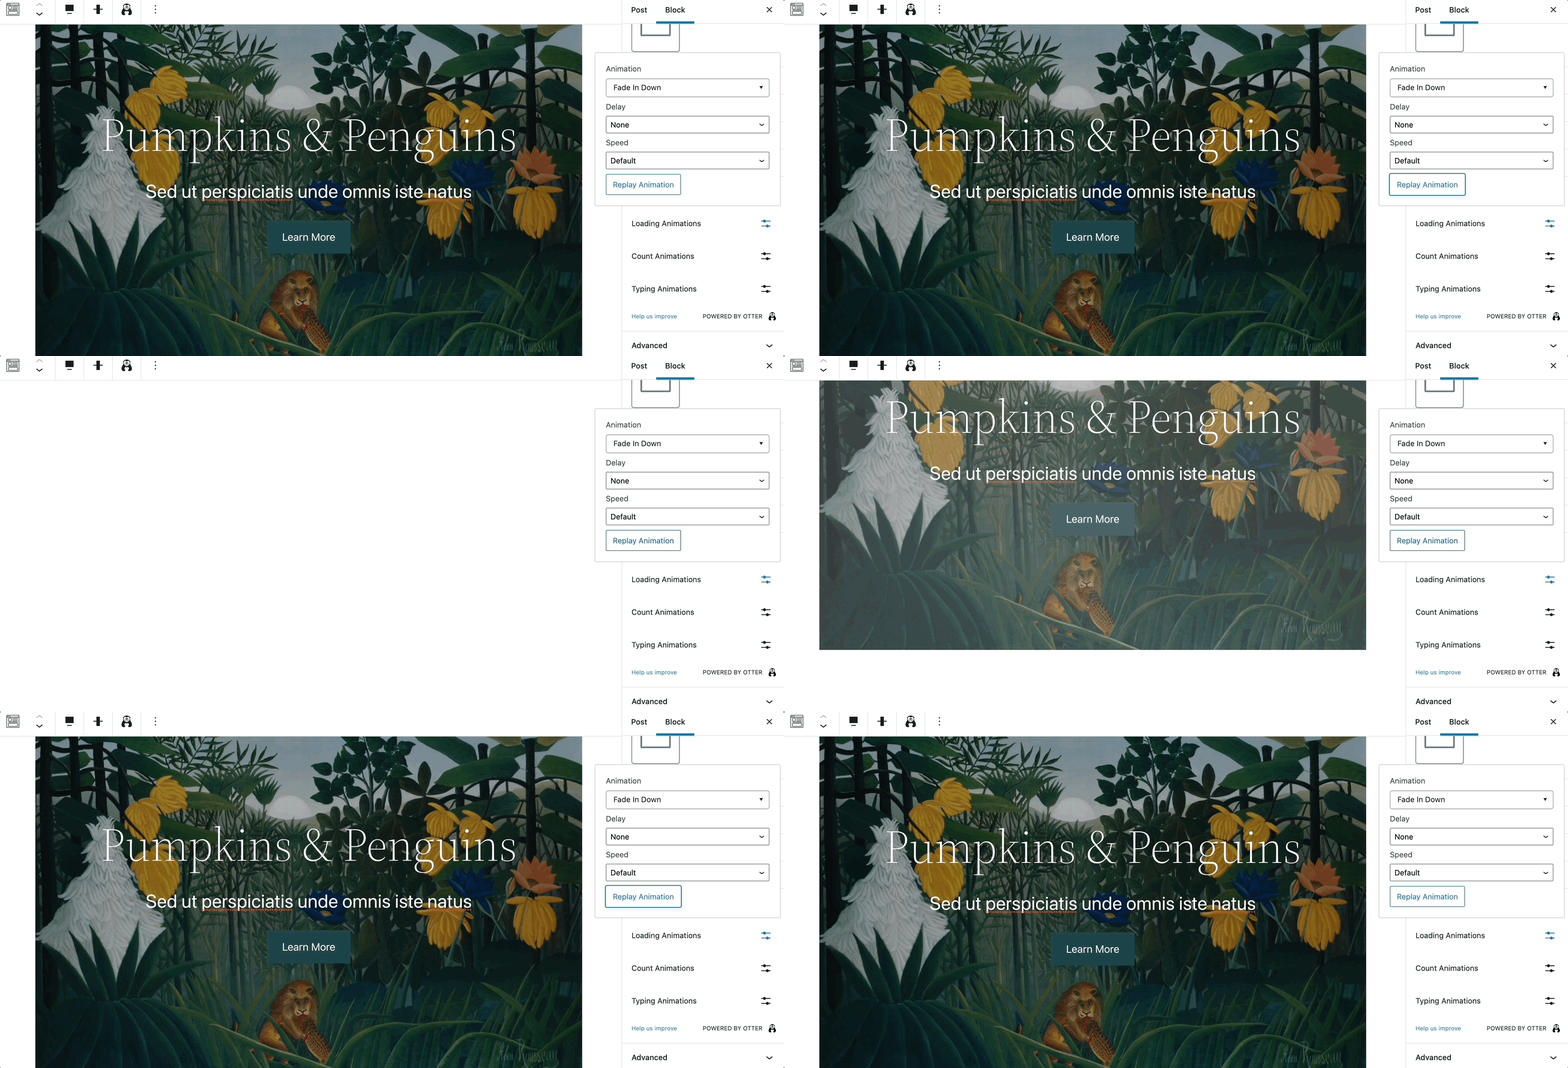
You’re also able to customize the default animation speed and set a delay if needed. To see these results, hit Replay Animation.
If you want to highlight a number on your website, you might add a counting animation. When users visit your website, they’ll see the rising number of customers, members, or other impressive statistics:
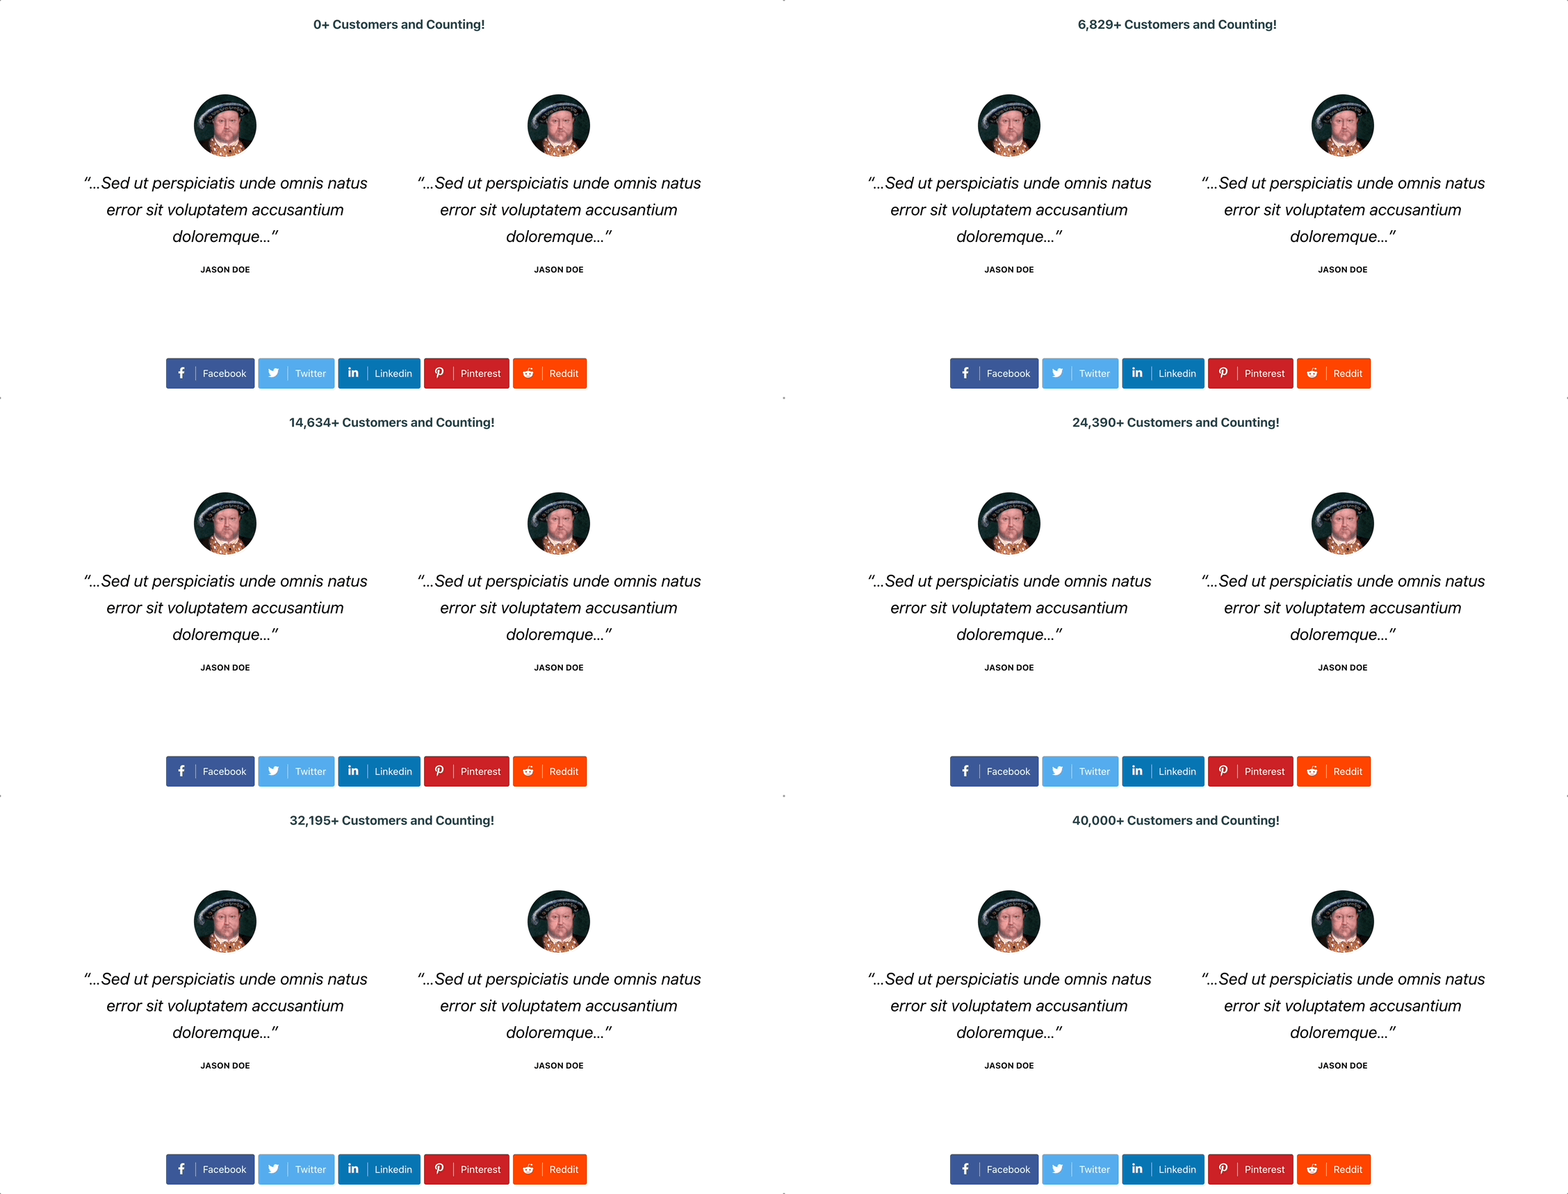
In Otter Blocks, select the number you want to emphasize. Next, find the Count Animation option in the toolbar:

Alternatively, you could add animated text. You’ll simply need to find the Typing Animation setting:

Once you save your changes, visitors will see animated typing for the selected text. It can draw their attention to a specific part of your site:

When used correctly, these animations could make your website unique, engaging, and user-friendly!
6. Advanced settings (CSS, visibility conditions, and dynamic content)
Let’s take a look at some of the more advanced features that Otter Blocks offers for custom CSS, block visibility conditions, and inserting dynamic content.
Custom CSS
Using CSS lets you update the appearance of your WordPress website. Although this sometimes requires editing files, Otter Blocks enables you to add custom CSS directly in the Block Editor.
Add a block and scroll to the Custom CSS settings in the sidebar to do this.
By entering the code in the box, you’ll be able to modify the block’s properties:

Visibility Conditions
This is a really neat feature if you ever need to restrict some of the content on your site from view based on who’s watching, screen size, device, or other factors. Otter takes that idea and runs with it in its Visibility Conditions module.
Basically, you can select any block on your page, and assign a set of rules to it that will define when/who/how can see this content.

Some of the available conditions involve: screen size, whether the user is logged in, user role, post author, category, post type, tags, user’s purchase history with Stripe, country, cookie presence, and more. You can also limit block visibility to a specific date or time range. If you run an ecommerce store, you’ll be able to set rules based on cart conditions or purchase history.

Dynamic content
Apart from standard content, Otter also allows you to insert dynamic content from your WordPress database. Here’s how it works:
Click on the database icon when working on a block, then pick Dynamic Value:

From there, you can pick the specific value you want to include. This can be the post title, the post ID, the logged in user’s name, and also any custom field value. This opens up a range of possibilities when it comes to customization and page personalization.
The final block can look something like this, for example:

Of course, if you’d go to see that page on the front end, you’d see your name there instead of the placeholder.
7. Integrations
Otter integrates with a range of third-party services right out the gate. It’s interesting that each of them is pretty different in nature. We have Cloudflare Turnstile, Stripe, AI providers, Google Maps, and more. You can find all those integrations in Otter settings.

Otter Blocks ease of use
Otter Blocks should feel incredibly easy to use if you’re familiar with how the block editor works. It’s based on the same block-based system and simply adds extra elements to it.
Once you open a new post or page, you can start the design process by adding a relevant block pattern. There are many options built into WordPress, but Otter Blocks provides unique layouts for a variety of content.
To use a pre-designed pattern, click on it. Then, it will appear in the block editor:

Otter Blocks also makes it easy to add features like contact forms, pricing tables, and maps. It extends the default options in WordPress to avoid using another third-party plugin or custom coding:

Plus, Otter Blocks has many animations, integrations, and advanced settings that make it a practical choice for seasoned WordPress users. No matter your experience level, you can use this plugin to meet your design needs.
Otter Blocks pricing
So … how much does it cost?
Well, lucky for you, because Otter Blocks provides a free version of its plugin in the WordPress.org plugin directory. It includes over 30 blocks. You’ll also have control over colors, animations, and typography.
However, if you find yourself needing additional blocks, the premium version of Otter Blocks unlocks even more options. These include add-to-cart buttons, business hour information, and product reviews.
Otter Pro extends on that and delivers additional blocks and features. Just to name the key elements in the pro version:
- Premium Design Library
- Dynamic Content
- Advanced Visibility Conditions
- Popup & Conversion Tools
- Advanced Forms
- WooCommerce Builder
- Review & Comparison Blocks
- Local Fonts
- Priority Support
💸 If you want to purchase Otter Blocks, the premium plans start at $69.00 per year.
Pros and cons
If you enjoy using the default WordPress block editor but need additional features and functionality, the Otter Blocks plugin can be an effective tool. With 30+ additional blocks and pre-designed patterns, Otter Blocks makes it easy to design various content types.
More advanced WordPress users can also benefit from custom CSS, block visibility conditions, dynamic content, and the ability to insert some truly custom sections with the use of AI.
However, keep in mind that Otter Blocks is still based on the native WordPress block editor, so it can’t offer you full 100% visual, drag-and-drop design flexibility like you might get with a different page builder. On the flip side, remember that page builder plugins also have drawbacks, especially when it comes to performance.
🧐 Final thoughts
Although the native WordPress block editor provides plenty of design blocks, you may need additional features and functionality for your website. While you could install a page builder plugin, you might not want to learn how to use a new drag-and-drop interface.
Otter Blocks is just great at integrating with the native block editor by adding new blocks, patterns, animations, whole designs, AI features, and much more. It can be an effective option for beginners looking to expand the default WordPress functionality.
Do you have any questions about our Otter Blocks review or whether Otter Blocks is the right tool for your website? Ask in the comments section below!
…
Don’t forget to join our crash course on speeding up your WordPress site. Learn more below:
How to Speed Up Your WordPress Site
With some simple fixes, you can reduce your loading times by even 50-80% 🚀
By entering your email above, you're subscribing to our weekly newsletter. You can change your mind at any time. We respect your inbox and privacy.


