
Transferring your site to a new host can be a bit scary if you haven’t done it before. In this week’s post, we’ll cover how to handle to handle the domain portion of transferring your site to SiteGround.
- Login to your SiteGround account and the site where your domain name is registered (in my case, GoDaddy).

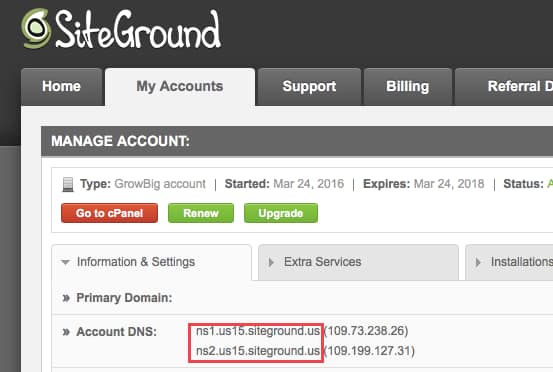
(click to enlarge) - Make sure your domain name is pointing to your new host. How you do this depends on who your domain is registered with, however it should be as simple as changing your nameserver settings on your domain registrar to point to your new host. If you have shared SiteGround hosting, you can find the nameserver address by logging into your SiteGround account and selecting “My Accounts” > “Information and Settings”. Then copying the information next to “Account DNS”. In this case, I’ll point my domain to ns1.us15.siteground.us and ns2.us15.siteground.us.

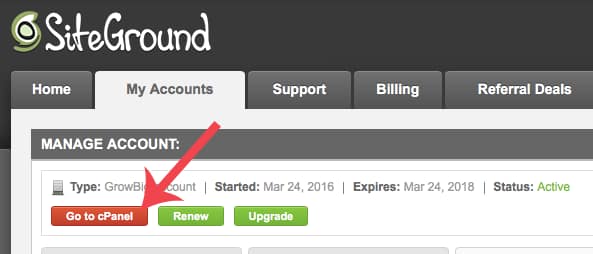
(click to enlarge) - Once you’ve updated your settings on your domain registrar, head back to SiteGround. Select the tab for “My Accounts” if you haven’t already and click the button for “Access cPanel” at the top of the screen.

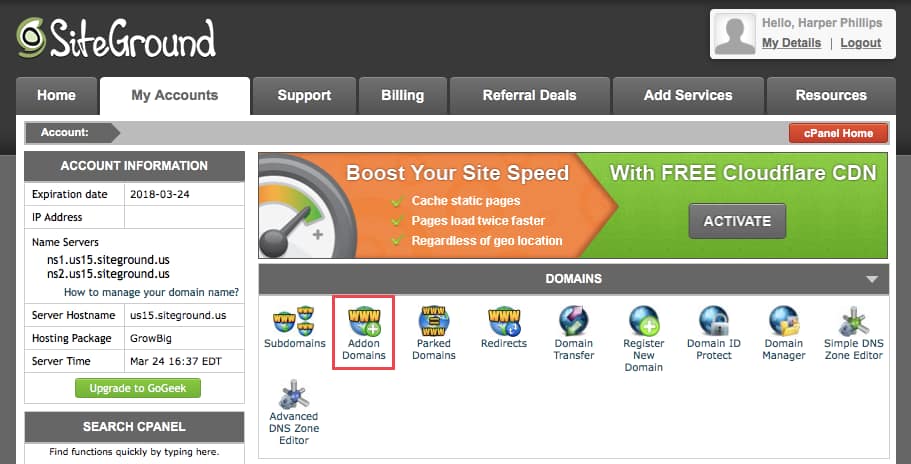
(click to enlarge) - Click “Add on domains”.

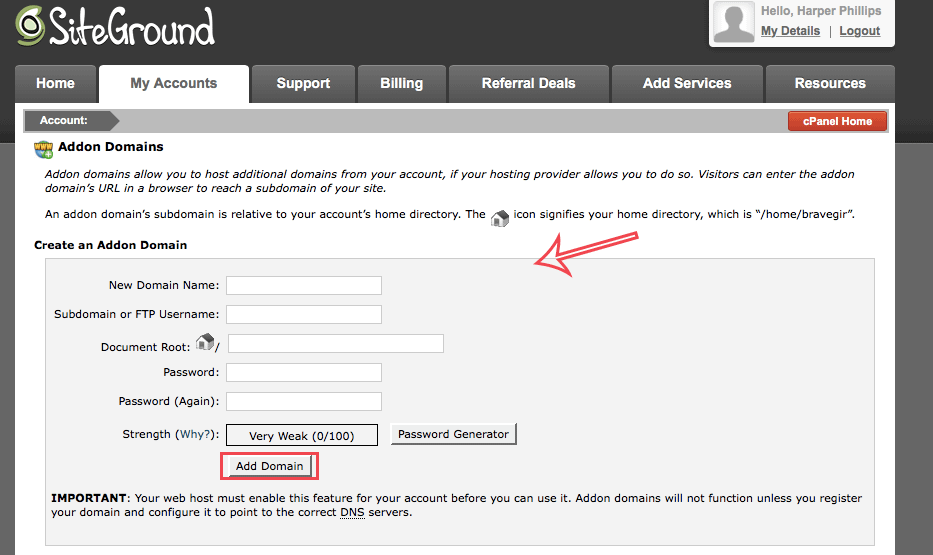
(click to enlarge) - Enter your domain name and other requested information in the fields provided. Then click “Add Domain”. If you’ve never done this step before, you’re telling SiteGround which folder in this hosting account (and new FTP account) corresponds to the domain you’re working on.

(click to enlarge) That’s it! Your domain should have been successfully transferred, however it can take up to 24 hours for DNS caches to clear and your requests to reflect the change. If you need to check faster, head over to dnschecker.org or try from a different internet service provider — a cell phone (not on your WiFi) or your local library. If you don’t mind the wait, go ahead and clear your web browsers history and check back later to make sure your site is now pointing to SiteGround. Since you haven’t transferred the rest of your site’s data yet, it won’t yet look like your old site but will direct to a holding page. Check back next week when we’ll teach you how to install WordPress on your new site and complete the transfer.

Do I need to buy new hosting on Siteground before changing from GoDaddy?
Hi VIJAY KUMAR. There is no doubt you need a new hosting service before the migration. Here is the official tutorial from SiteGround https://www.siteground.com/tutorials/getting-started/point-domain-siteground-servers/. Happy webmastering.
[…] yourself! This post is the third in our series about how to transfer to SiteGround (check out parts 1 and part 2, if you haven’t already). Today, we’ll cover how to set up a new email address […]
[…] thought this would be a good time to teach you how to tackle that site transfer yourself! Now that you’ve successfully transferred your domain, this week, we’ll walk you through how to install WordPress on your new […]