
Now that you have a working design for your site and have created a few new pages of content, you’ll want to make sure your visitors can find the right information easily by adding your new pages to your menu. It’s a very easy task, so let’s get started!
- Log in to your WordPress dashboard.

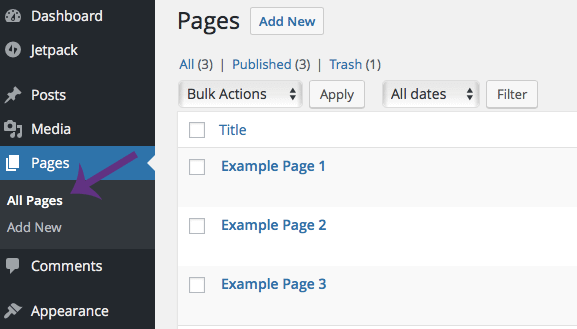
(click to enlarge) - Select “All Pages” from the drop-down menu under “Pages” in the left side bar, and familiarize yourself with the titles of the pages you previously created.

(click to enlarge) - Select “Menus” from the drop-down menu under “Appearances”.
- Type a name in the “Menu Name” dialogue box (ex. “Main” or “Header”), then click “Create Menu”.

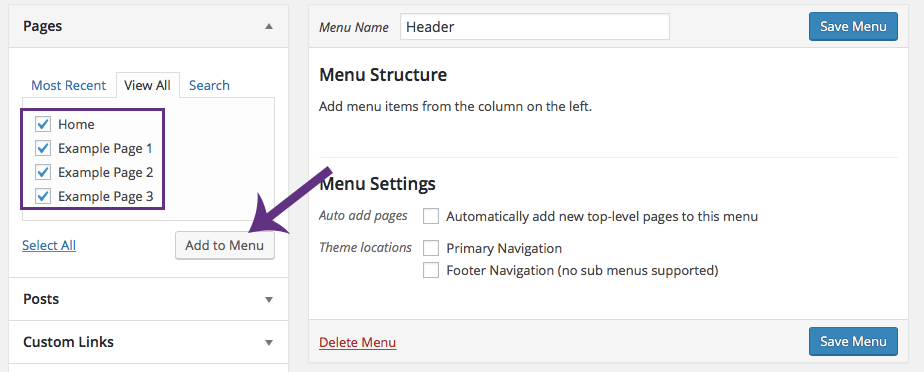
(click to enlarge) - Click the boxes for the pages you want to include in your new menu then click “Add to Menu”. Don’t forget to toggle to “View All” if you have several new pages you’re adding.

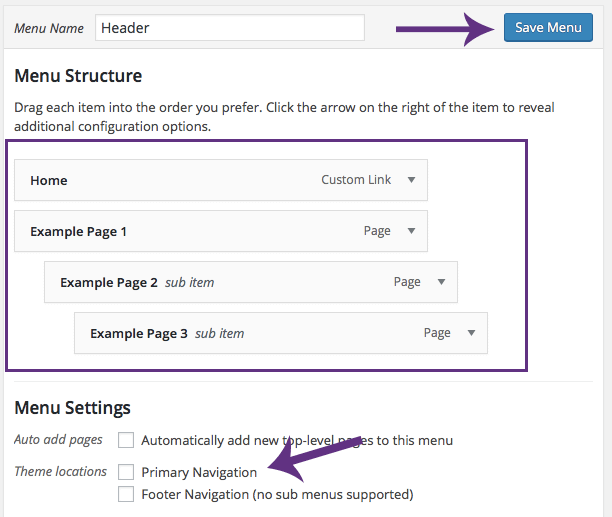
(click to enlarge) - Drag the pages in your new menu so they’re arranged in the order that you want them to appear on your site, keeping in mind that you can make a page a “Sub Item” by pulling it to the right underneath its parent item.
- Select any appropriate boxes under “Menu Settings”. Since this is my first menu, I’ll be selecting “Primary Navigation”.
- Once you’re satisfied with your menu’s settings and order, click “Save Menu”.

(click to enlarge) - Open your site in a new tab and make sure your new menu appears the way you intended (you may need to clear the cache it is doesn’t). And that’s it!


Thank you!!! This helped.
The options to add menu in menu settings is not there anymore. I have already created a menu with pages but cannot do it anymore.
when click on the menu name that is not appearing.Do i need to make that a menu name? I maked that as a category.please help
I had difficulty with the menu option finding the pages I created. The heading would appear but the text and graphics would not.
How to map the posts in the respective Categories/Menus?
I have done what has been shared here in the post. But clicig on the menu takes to a blank page. Why ?
1. I had created categories
2. Mapped every post to the respective category
3. Now pulled all categories as Menus
4. Menu is displayed successfully. But the posts are not seen. Why ?
im having the same problem. I cant get my posts that i have placed in categories that match my menu to show up when you click on my menu pages